How To: Create a MySQL Database Diagram Using a Sketch Image
Often we make some sketches of the database we plan to create on a blackboard or a sheet of paper before we actually design its structure on computer. After that we discuss the entities we’ve got, normalize them and repeat these actions several times. As a result we get a completely approved database structure in the form of an image file in the project documentation.
Question: How to create a database diagram basing on the image available?
Let’s try to do this using Database Designer of dbForge Studio for MySQL.
Let us suppose that you have a sketch of the future database:
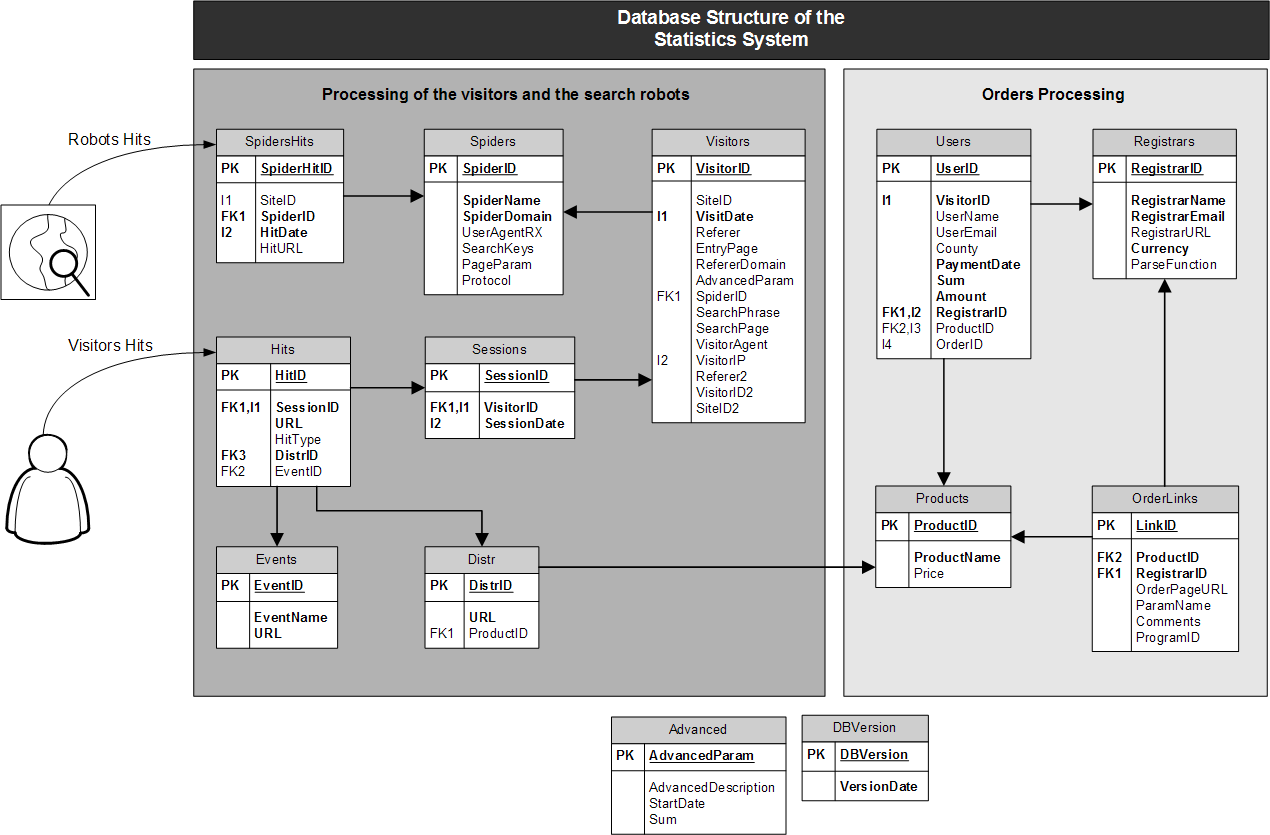
Database Structure
To place this picture onto an empty diagram you should create an empty document, for example, Diagram1.dbd by pressing New Database Diagram on the Standard toolbar. After that you should press the New Image button on the Database Diagram toolbar. The mouse pointer will change to an icon with a picture. Click on any part of the diagram. In the Open dialog window that appeared select the image with the diagram structure sketch.
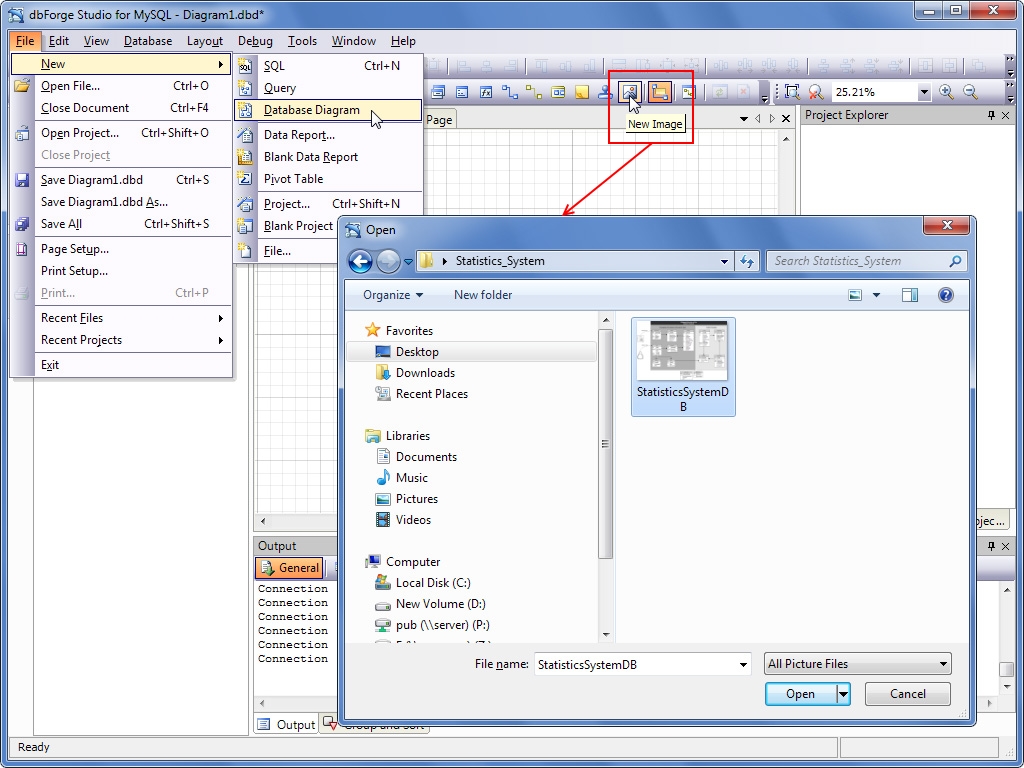
Database Designer: Open New Image
Now as you see the database sketch you can recreate the database from it. Let’s create the necessary tables with Primary Key and indexes one by one. For example, to create the Sessions table press the New Table button on the Database Diagram toolbar. The mouse pointer should change to an icon with a table. Click on any part of the diagram. A window for editing the Table1 table should appear.
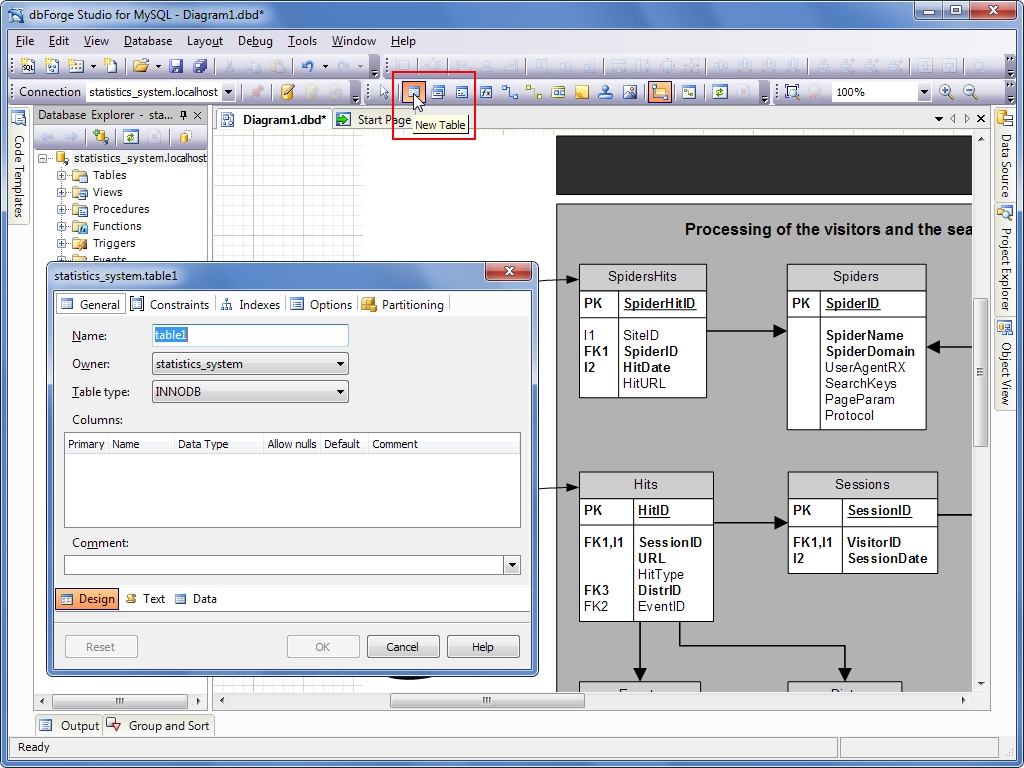
Database Designer: Create New Table
Using the database editor window you should do the following:
- On the General tab edit the table name; add a key column (in this column you should edit its name, datatype, and set the Primary option); add all other columns (uncheck the additional Allow nulls(*) option)
- On the Indexes tab let’s create indexes for all key columns and uncheck the Unique option
As a result we’ve got a new entity on the diagram – the Sessions table.
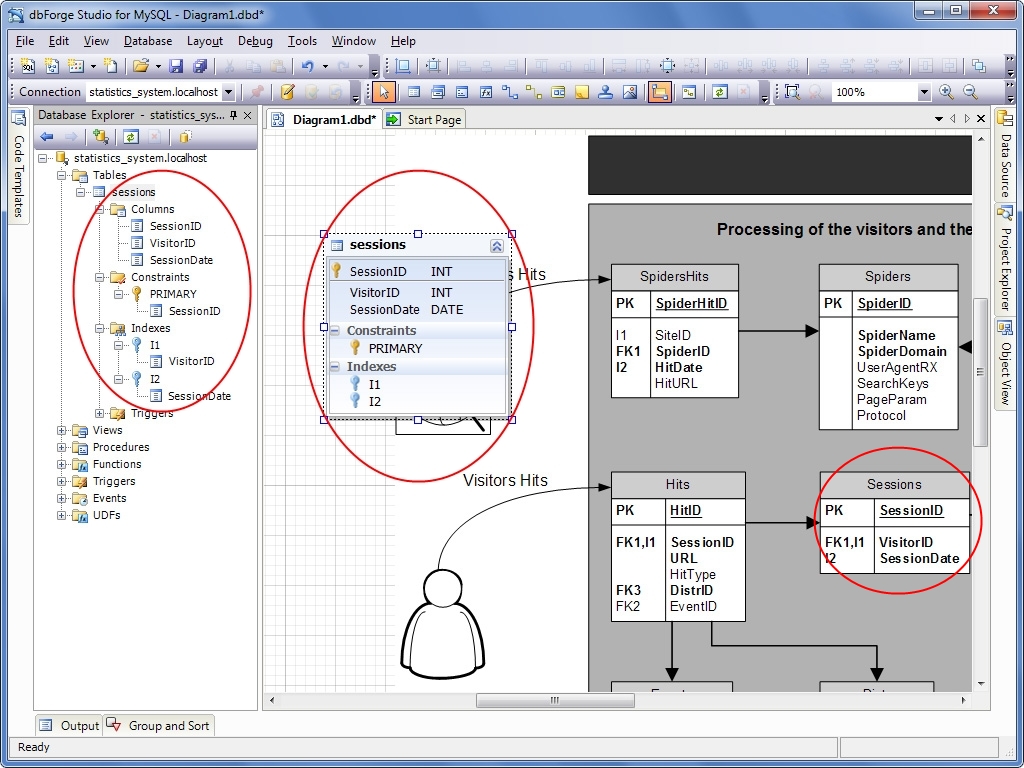
Database Designer: Design New Table
Move the table on the diagram not far from its presentation on the sketch. Then create the next table, for example, Hits, in the same way and move it not far from its presentation on the sketch.
Now we can add a relation between the Hits and Sessions tables. To do this, you should:
- press the New Relation button on the Database Diagram toolbar. The mouse pointer should change to an icon with an arrow. Then click the Hits table, and, without releasing the mouse button, drag the cursor to any part of the Sessions table and release the mouse button(**).
- in the Foreign Key Properties window that appeared select the SessionID column from the “Table Columns” columns list and press the [→] button. The SessionID column was moved to the “Constraints Columns” column list. Save these changes by pressing OK.
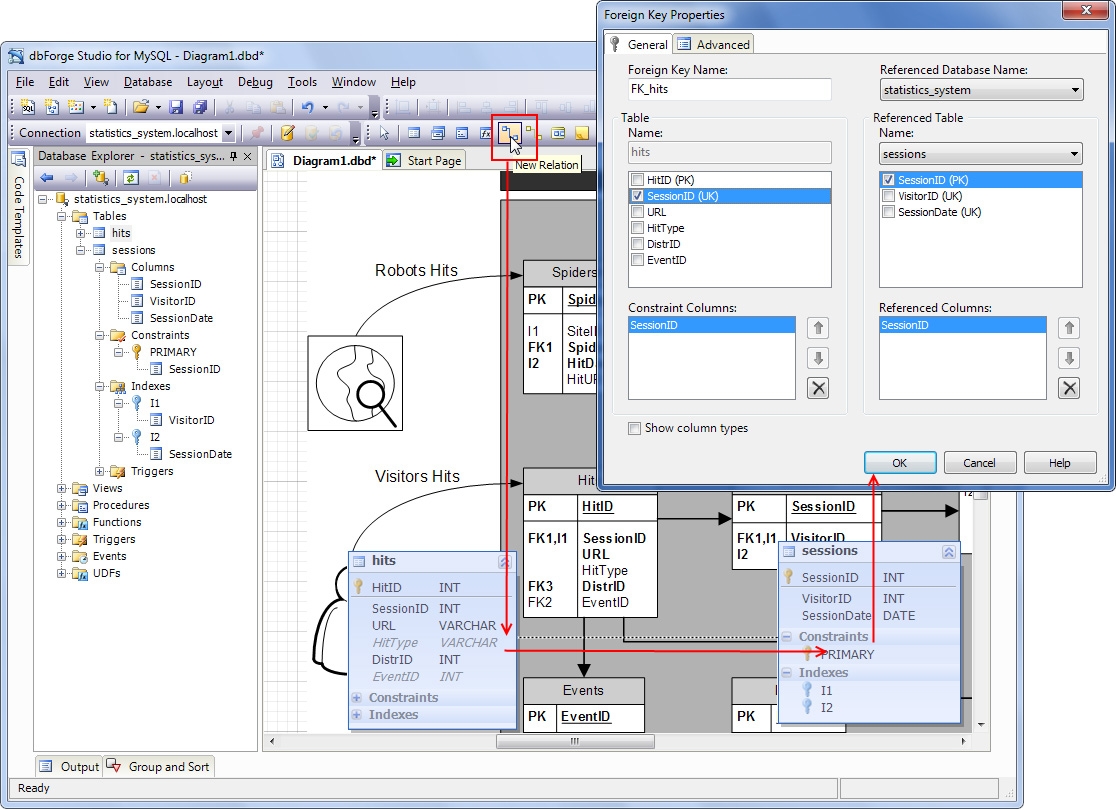
Database Designer: Create New Relation
As a result, we’ve bound two tables – “Hits” and “Sessions” using the foreign key “hits_FK”.

Database Designer: Display Relation
Now we should repeat the same operations as creating and designing tables, creating indexes and relations between tables.
An important part of the database design process is logical division of database objects into groups. Database Designer available in dbForge Studio for MySQL has a special Container component for this purpose.
To create a new container and move the necessary objects into it you should:
- Press the New Container button on the Database Diagram toolbar. The mouse pointer should change to an icon with three squares. Click on an empty place on the diagram. A container with the Group1 name appeared. Let’s change the container name;
- Select the tables you want to move to the container. For example, let’s select Users, Registrars, Products, and OrderLinks tables;
- Move the selected tables onto the container;

Database Designer: New Container
And the final step in the process of database creation using a sketch is the optimization of database objects location on the diagram. The algorithm used by Layout Diagram is designed so that the program redraws the relations between tables so that they would not intersect each other. This allows to save space on the diagram and makes it readable.

Database Designer: Layout Diagram
As a result of the actions described above we’ve created a database using a sketch without switching over to other applications displaying the image of the diagram using Alt+Tab or printing the sketch owing to the unique functionality of dbForge Studio for MySQL.
(*) On the diagram, columns with the Not Null property enabled are displayed in bold (for example, the HitDate column of the SpiderHits table) unlike other columns (for example, the HitUrl column of the SpiderHits table).
(**) To create Foreign Key between tables both these tables should have been created with Engine=InnoDB.
You can download a free 30-day evaluation of dbForge Studio for MySQL.
tags: database diagram, MySQL, dbForge Studio for MySQL